
3. Python Environments#
In this lecture, you will learn about Python environments and how best to use them to create reproducible pipelines.
Attribution The conceptual content of this lecture is modified from several excellent sources: Python Packages for Earth Data Science from Earth Lab CU Boulder; Managing Python Environments from Columbia University; and Introduction to Conda for (Data) Scientists from Software Carpentry. The tooling sections are based on the Pixi documentation.
3.1. Background#
Python and nearly all of the software packages in the scientific python ecosystem are open-source. They are maintained and developed by a community of scientists and programmers, some of whose work is supported by universities, non-profits, and for-profit corporations. This work mostly happens in the open, via github and other online collaboration platforms.
When working with a programming language, such as Python, that can do almost anything, one has to wonder how this is possible. You download Python, it has about 25 MB, how can everything be included in this small data package. The answer is - it is not. Python, as well as many other programming languages use external libraries or packages for being able to do almost anything. You can see this already when you start programming. After learning some very basics, you often learn how to import something into your script or session.
Definitions
Module: a collection of functions and variables, as in a script
Package: a collection of modules with an __init__.py file (can be empty), as in a directory with scripts
Library: a collection of packages with related functionality
Library/Package are often used interchangeably.
3.2. Dependencies#
A bit further into your programming career you may notice/have noticed that many packages do not just do everything on their own. Instead, they depend on other packages for their functionality. For example, the SciPy package is used for numerical routines. To not reinvent the wheel, the package makes use of other packages, such as NumPy (numerical python) and matplotlib (plotting) and many more. So we say that NumPy and matplotlib are dependencies of SciPy.
Many packages are being further developed all the time, generating different versions of packages. During development it may happen that a function call changes and/or functionalities are added or removed. If one package can depend on another, this may create issues. Therefore it is not only important to know that e.g. SciPy depends on NumPy and matplotlib, but also that it depends on NumPy version >= 1.6 and matplotlib version >= 1.1. NumPy version 1.5 in this case would not be sufficient.
This emphasizes the need for creating and recording environments (in virtual terms!) to run your Python code.
3.3. Environments#
When starting with programming we may not use many packages yet and the installation may be straightforward. But for most people, there comes a time when one version of a package or also the programming language is not enough anymore. You may find an older tool that depends on an older version of your programming language (e.g. Python 2.7), but many of your other tools depend on a newer version (e.g. Python 3.6). You could now start up another computer or virtual machine to run the other version of the programming language, but this is not very handy, since you may want to use the tools together in a workflow later on. Here, environments are one solution to the problem. Nowadays there are several environment management systems following a similar idea: Instead of having to use multiple computers or virtual machines to run different versions of the same package, you can install packages in isolated environments.
However, managing Python development environments can be tricky, especially if you are new to the language or less familiar with computer science concepts. In this course, we introduce tools to make it easy to manage and reproduce your Python environments on any machine (local computer/server/cloud).
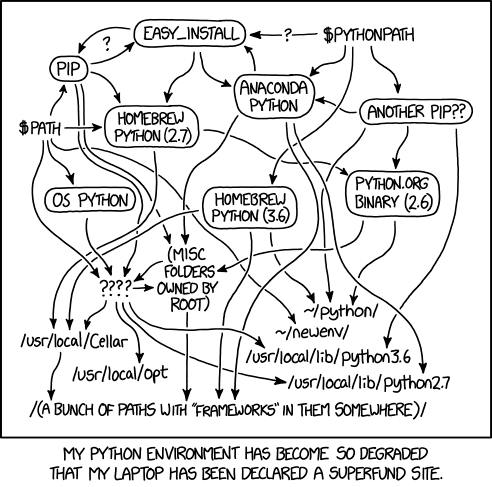
Fig. 3.1 The complexity of Python environments as illustrated by xkcd.#
3.4. Environment management#
An environment management system solves a number of problems commonly encountered by (data) scientists.
An application you need for a research project requires different versions of your base programming language or different versions of various third-party packages from the versions that you are currently using.
An application you developed as part of a previous research project that worked fine on your system six months ago now no longer works.
Code that was written for a joint research project works on your machine but not on your collaborators’ machines.
An application that you are developing on your local machine doesn’t provide the same results when run on your remote cluster.
An environment management system enables you to set up a new, project specific software environment containing specific Python versions as well as the versions of additional packages and required dependencies that are all mutually compatible.
Environment management systems help resolve dependency issues by allowing you to use different versions of a package for different projects.
Make your projects self-contained and reproducible by capturing all package dependencies in a single file.
Allow you to install packages on a host on which you do not have admin privileges.
3.5. Pixi#
In this course, we will use Pixi to manage our Python environments and packages. Pixi is a fast, modern, open-source package and environment management tool. It draws packages from the same ecosystem you may have heard of through Conda (the conda-forge community repository of 30,000+ packages), and it can also install packages from the Python Package Index (PyPI) in the same project. This means you can manage all of your dependencies, whether they come from conda-forge or PyPI, from a single place.

Fig. 3.2 Pixi Logo (source: Pixi Documentation)#
We choose Pixi for a few reasons that map directly onto the goals of this course:
Reproducibility by default. Every time you change your dependencies, Pixi automatically writes a lock file (
pixi.lock) that records the exact version of every package (and every dependency of every package) for each operating system. Anyone who has your project can recreate a byte-for-byte identical environment. You do not have to remember to pin versions by hand.One tool for
conda-forgeand PyPI packages. No need to juggle two separate package managers or worry about them stepping on each other.It is fast. Pixi resolves and installs environments quickly, which matters when you are iterating on a project or following along in class.
Project-based environments. Pixi keeps each project’s environment inside the project’s own folder. This fits naturally with how you already organize your work in git repositories.
A note on Conda
If you have used Python before, you may have encountered Conda (or Miniconda/Anaconda). Conda is a widely used package and environment manager, and it is still the most common tool you will see in scientific computing tutorials, documentation, and job settings. Pixi is built on top of the same conda-forge package ecosystem, so the packages you install are the same. Later in this lecture we include a short “Reading Conda in the wild” section so you can recognize and understand Conda when you come across it.
3.5.1. The project-based model#
The most important idea to understand about Pixi is that environments are tied to projects, not created as free-floating named environments on your system.
When you start a new project, you run pixi init inside the project folder. Pixi creates a small manifest file that describes the project’s dependencies, and it installs the environment into a hidden .pixi/ folder inside that same project directory. Your environment lives next to your code, and the manifest that describes it lives in your git repository. To reproduce the environment on another machine, you simply get a copy of the project (for example by cloning the repository) and run one command.
This is different from the older model, where you would create a single environment with a name (like myenv) that lives in a central location on your computer and is shared across every project. If you have seen conda activate myenv before, that is the named-environment model. Pixi’s per-project model means each project is self-contained and there is no risk of one project’s environment silently drifting because you updated a package for another project.
3.6. Installing Pixi#
You can install Pixi with a single command. Follow the latest instructions on the Pixi installation page, which are summarized below.
macOS and Linux
$ curl -fsSL https://pixi.sh/install.sh | sh
Windows (in PowerShell)
$ iwr -useb https://pixi.sh/install.ps1 | iex
If you are on Windows and using Windows Subsystem for Linux (WSL), which we recommended in the Unix lecture, use the macOS/Linux command inside your WSL terminal.
After installing, close and reopen your terminal so that the pixi command becomes available. You can confirm the installation by checking the version:
$ pixi --version
3.7. Starting a New Project#
To create a new project, make a directory for it and run pixi init inside it. Let’s create a new project:
$ mkdir hello-world
$ cd hello-world
$ pixi init
You can also do both steps at once by passing the name to pixi init:
$ pixi init hello-world
After running this command, Pixi creates a few things in your project folder, including a manifest file named pixi.toml and a .gitignore. If you open pixi.toml, it will look something like this:
[workspace]
name = "hello-world"
version = "0.1.0"
channels = ["conda-forge"]
platforms = ["osx-arm64"]

[dependencies]

[tasks]
Let’s look at what these sections mean:
[workspace]holds general information about the project: itsname; itsversion(the version of your own project, following semantic versioning — optional, and only important if you package your project for distribution, so you can leave it as is); thechannelswhere packages are downloaded from (conda-forgeby default); and theplatforms(operating systems) that the environment should support. Note: the value forplatformson your machine might be different depending on the type of machine/operating system you use.[dependencies]is where yourconda-forgepackages will be listed. It’s empty for now.[tasks]is where you can define reusable commands. We will cover tasks below.
Note
TOML stands for Tom’s Obvious, Minimal Language, a widely used, human-readable format for configuration files.
Tip
The .pixi/ folder that Pixi creates to store the actual installed environment can get large and is fully reproducible from the manifest and lock file. Pixi automatically adds it to your .gitignore so you don’t commit it. The files you do commit to git are pixi.toml and pixi.lock.
3.7.1. Supporting Multiple Operating Systems#
By default, Pixi records only the platform of the machine you ran pixi init on (for example osx-arm64 for an Apple Silicon Mac). Because collaborators in this course use different operating systems, it is good practice to list all the platforms your project should support. You can edit the platforms line in pixi.toml to include the common ones:
platforms = ["osx-arm64", "osx-64", "linux-64"]
Pixi will then solve and lock the environment for each of these platforms, so the exact same set of packages can be installed on any of them.
Note
If you are on Windows using WSL, as recommended in the Unix lecture, your platform is linux-64 (not win-64). Even though the physical machine runs Windows, WSL is a Linux distribution, so the packages Pixi installs are Linux builds. This is why win-64 does not appear in the list above.
3.8. Adding Packages#
To add a package to your project, use pixi add followed by the package name. For example, to add NumPy:
$ pixi add numpy
This one command does several things: it adds numpy to the [dependencies] section of your pixi.toml, it resolves compatible versions of numpy and all of its dependencies, it records those exact versions in pixi.lock, and it installs them into your project’s environment.
In order to make your results reproducible, it is a “best practice” to specify the version of the important packages you depend on. You can pin a version directly when adding a package:
$ pixi add "numpy=2.5.2"
After adding a package, your pixi.toml will show it under [dependencies]:
[dependencies]
numpy = "2.5.2"
You can add multiple packages in a single command, and Pixi will find mutually compatible versions of all of them:
$ pixi add numpy pandas matplotlib
It is also good practice to pin the Python version for your project, which you can do the same way:
$ pixi add "python=3.13.*"
To see all the packages currently installed in your project’s environment, use:
$ pixi list
3.8.1. Installing PyPI Packages#
Some Python packages are published only on PyPI and not on conda-forge. Pixi can install these too, in the same project, by passing the --pypi flag:
$ pixi add --pypi some-package
These packages are listed in a separate [pypi-dependencies] section of your manifest so that it is always clear which packages come from conda-forge and which come from PyPI:
[dependencies]
python = "3.13.*"
numpy = "2.5.2"

[pypi-dependencies]
some-package = "*"
Tip
Prefer conda-forge packages (plain pixi add) when a package is available there, and reach for --pypi only when it is not. conda-forge packages include compiled dependencies (which is important for the geospatial libraries we use later in the course) that are built to work together.
3.9. Manifest vs. Lock File: What to Pin#
A common question when starting a project is whether you should hand-write all of your packages and their versions into pixi.toml, or keep adding them with pixi add. In almost all cases, use pixi add. When you run pixi add, Pixi resolves a mutually compatible set of versions, records the exact result in pixi.lock, and installs it, all in one step. If you instead type packages directly into the manifest, nothing is resolved, locked, or installed until you run pixi install, and a typo or an impossible version combination surfaces later and less clearly. Hand-editing the manifest is the right move for the things that are not packages, such as adding platforms, channels, or [tasks], or for loosening or tightening a version constraint you already have.
This connects to the single most important idea about reproducibility in Pixi: the manifest and the lock file do different jobs.
The manifest (
pixi.toml) records your intent: the packages you actually care about, with version constraints only as tight as you need.The lock file (
pixi.lock) records the exact resolved versions of everything, including every transitive dependency, for every platform.
Because the lock file already guarantees exact reproducibility, you should not pin an exact version on every package in the manifest. Doing so makes the environment brittle and hard to update, for no reproducibility benefit, since the lock file was already capturing the exact versions. The good habit is to pin selectively: pin python and the few libraries whose version genuinely matters to your analysis, and let the resolver choose compatible versions for everything else.
Rule of thumb
Add packages with pixi add, pin only what matters (for example pixi add "python=3.13.*" and a specific version for a key library), and rely on pixi.lock, committed to git, for exact reproducibility. Edit pixi.toml by hand for platforms, channels, and [tasks].
3.10. Working in Your Environment#
Once you have added your packages, there are two main ways to run code inside your project’s environment.
Run a single command with pixi run. This executes a command inside the environment without changing your shell:
$ pixi run python my_script.py
Start an interactive shell inside the environment with pixi shell:
$ pixi shell
After running pixi shell, your terminal is now “inside” the project’s environment, and any command you run (like python) uses the packages from that environment. To leave the environment, type:
$ exit
Note
If you run pixi run or pixi shell and the environment has not been installed yet (for example right after cloning a project), Pixi will automatically install it first based on the manifest and lock file. You can also install it explicitly with pixi install.
3.11. Reproducing an Environment#
This is where the reproducibility payoff arrives. Because your pixi.toml (what you asked for) and pixi.lock (the exact resolved versions) are both stored in your project folder and committed to git, anyone can recreate your environment exactly.
Suppose a collaborator wants to run your project. They clone the repository and run a single command:
$ git clone git@github.com:<user>/hello-world.git
$ cd hello-world
$ pixi install
pixi install reads the pixi.lock file and installs the exact same versions of every package that you had, for their operating system. There is no separate “environment file” to write and no versions to pin by hand, because the lock file already captured everything the moment you added your packages.
Why a lock file matters
The manifest (pixi.toml) records what you asked for (e.g. “numpy 2.5.2”). The lock file (pixi.lock) records what you actually got, all the way down: the exact version and build of numpy, and of every one of its dependencies, for every platform. Two people installing from the same lock file six months apart get identical environments. This is the core of a reproducible pipeline, and it is why we build the habit now.
3.12. Tasks#
Pixi lets you save commonly used commands as named tasks in your project, so you (and your collaborators) don’t have to remember long commands. This is similar to a simple script runner built into your project.
You can add a task from the command line:
$ pixi task add hello "echo Hello from my project"
This adds an entry to the [tasks] section of your pixi.toml:
[tasks]
hello = "echo Hello from my project"
You can then run the task by name:
$ pixi run hello
Tasks are useful for capturing the steps of your workflow, for example a task that runs your analysis script or a task that runs your tests. Because tasks live in the manifest that is committed to git, they document how your project is meant to be run.
3.13. Global Tools#
Everything above installs packages into a specific project. Sometimes, however, you want a command-line tool available everywhere on your system, independent of any single project, for example a code formatter or a small utility. For this, Pixi provides pixi global.
$ pixi global install <tool-name>
Each tool you install this way gets its own isolated environment, but its command is made available system-wide. This is the right tool for standalone command-line programs. It is not the right place for your project’s analysis libraries (like numpy or pandas), which should always go into the project with pixi add so they are captured in that project’s reproducible manifest and lock file.
Warning
A good rule of thumb: if a package is something you import in your code, it belongs in the project (pixi add). If it is a standalone command-line tool you want available in any terminal, it can go in pixi global.
3.14. Reading Conda in the Wild#
Pixi is the tool you will use in this course, but Conda has been the dominant environment manager in scientific Python for over a decade. You will encounter it constantly, in tutorials, in project READMEs, on high-performance computing clusters, in some of the linked resources for this course, and in our own Docker lecture later in the semester. This short section is so that you can read and understand Conda when you meet it. You do not need to use it for your assignments.
Note
If you do decide to install Conda (for example, to follow an external tutorial), we recommend Miniconda, the lightweight, bare-minimum distribution that includes Conda, Python, and a few core packages. You can download it from this page.
Conda uses a named-environment model. Instead of a per-project folder, you create centrally stored environments that have names and can be activated from anywhere:
$ conda create --name myenv python=3.13
$ conda activate myenv
$ conda install numpy
$ conda deactivate
When a Conda environment is active, its name appears at the start of your prompt, for example (myenv) $. There is also a special base environment that is active by default.
Conda projects are often shared as an environment.yml file that lists the desired packages:
name: myenv
channels:
  - conda-forge
dependencies:
  - python=3.13
  - numpy=2.5.2
  - pandas=3.0.3
which someone recreates with:
$ conda env create -f environment.yml
The key differences from Pixi to keep in mind:
Conda environments are named and centrally stored; Pixi environments are per-project and stored next to your code.
An
environment.ymlrecords what you asked for but does not, by itself, lock the exact resolved versions of every dependency across platforms the way Pixi’spixi.lockdoes. Reproducibility with Conda takes extra, manual care.Conda draws packages from channels. The community
conda-forgechannel is free for everyone and is the one we (and Pixi) use. Note that Anaconda’s default channel can require a paid license for large commercial users, though education and non-profit research use are excluded; usingconda-forgeavoids this concern entirely.
Tip
If you’d like a quick reference, the Pixi documentation has a “Getting Started” guide and a full command reference. For Conda, this cheatsheet covers the most common commands.